• Blog
  • Shop
  • Resources
  • FAQ (Ask TGS)
  • About
  • Archive
  • Contact
  • Sign In My Account
Menu

The Gentleman Stationer

Vintage Living in the Modern World.
  • Blog
  • Shop
  • Resources
  • FAQ (Ask TGS)
  • About
  • Archive
  • Contact
  • Sign In My Account

Customizing Stationery: If Your Ideal Product Doesn't Exist, Make It Yourself!

July 14, 2021

If you fall deep enough into the stationery hobby, you inevitably will find yourself customizing your gear. Whether that means having fountain pen nibs custom ground for your writing style, mixing your own inks with an ink mixing kit, or binding your own notebooks and paper refills, there are literally dozens of different rabbit holes for you to explore. Even for someone like me, who’s essentially “tried everything” over the years, I love that I can still create new ways to keep this hobby interesting!

A Traveler’s Notebook refill compared against a standard A5 softcover notebook.

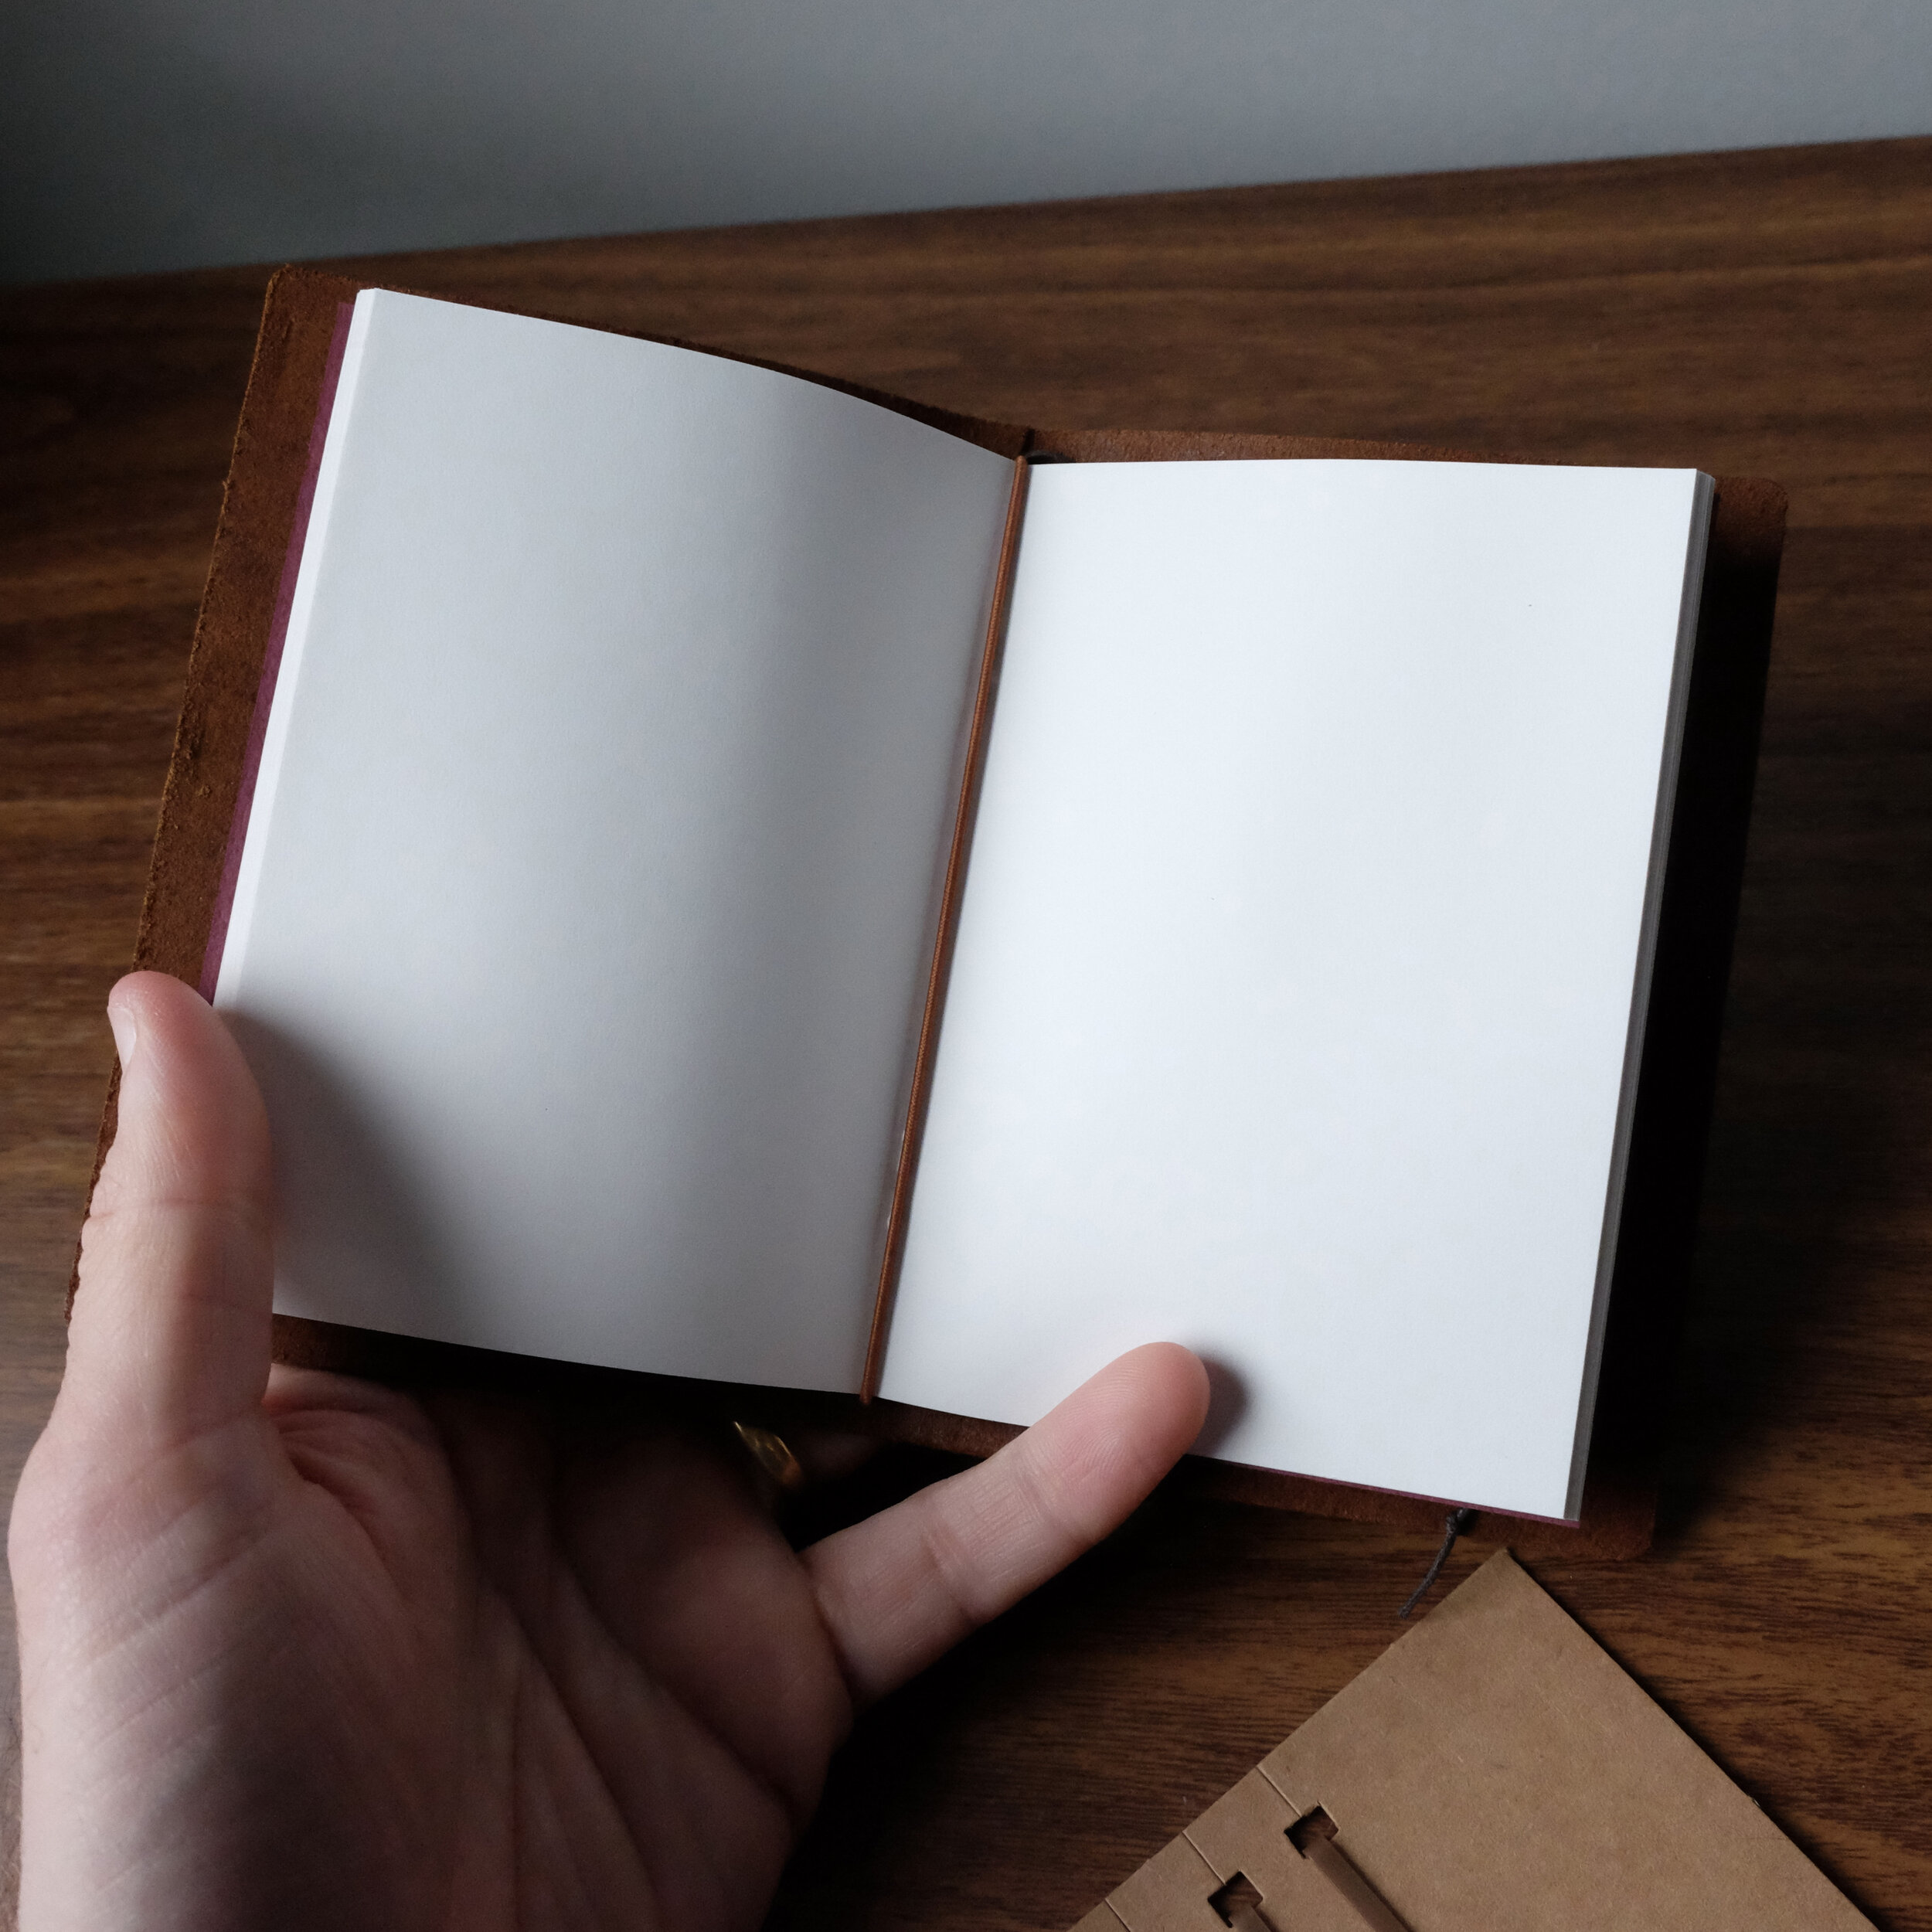
One thing I’ve not attempted much over the years is customizing notebooks. I have neither the space nor the time nor the skill to try bookbinding, and I’m fairly confident that I’ve exhausted all the goodwill of the other members of my household with my various hobbies, so making my own books is out the window. But what about cutting down or trimming notebooks from my existing stash where the size isn’t something I use? I’m talking specifically about softcover A5 notebooks - somehow I’ve accumulated a dozen or more of these small, “single subject” notebooks over the years, but if I use a thinner notebook, it tends to be in the Traveler’s Notebook system. What if I just cut the larger notebooks down?

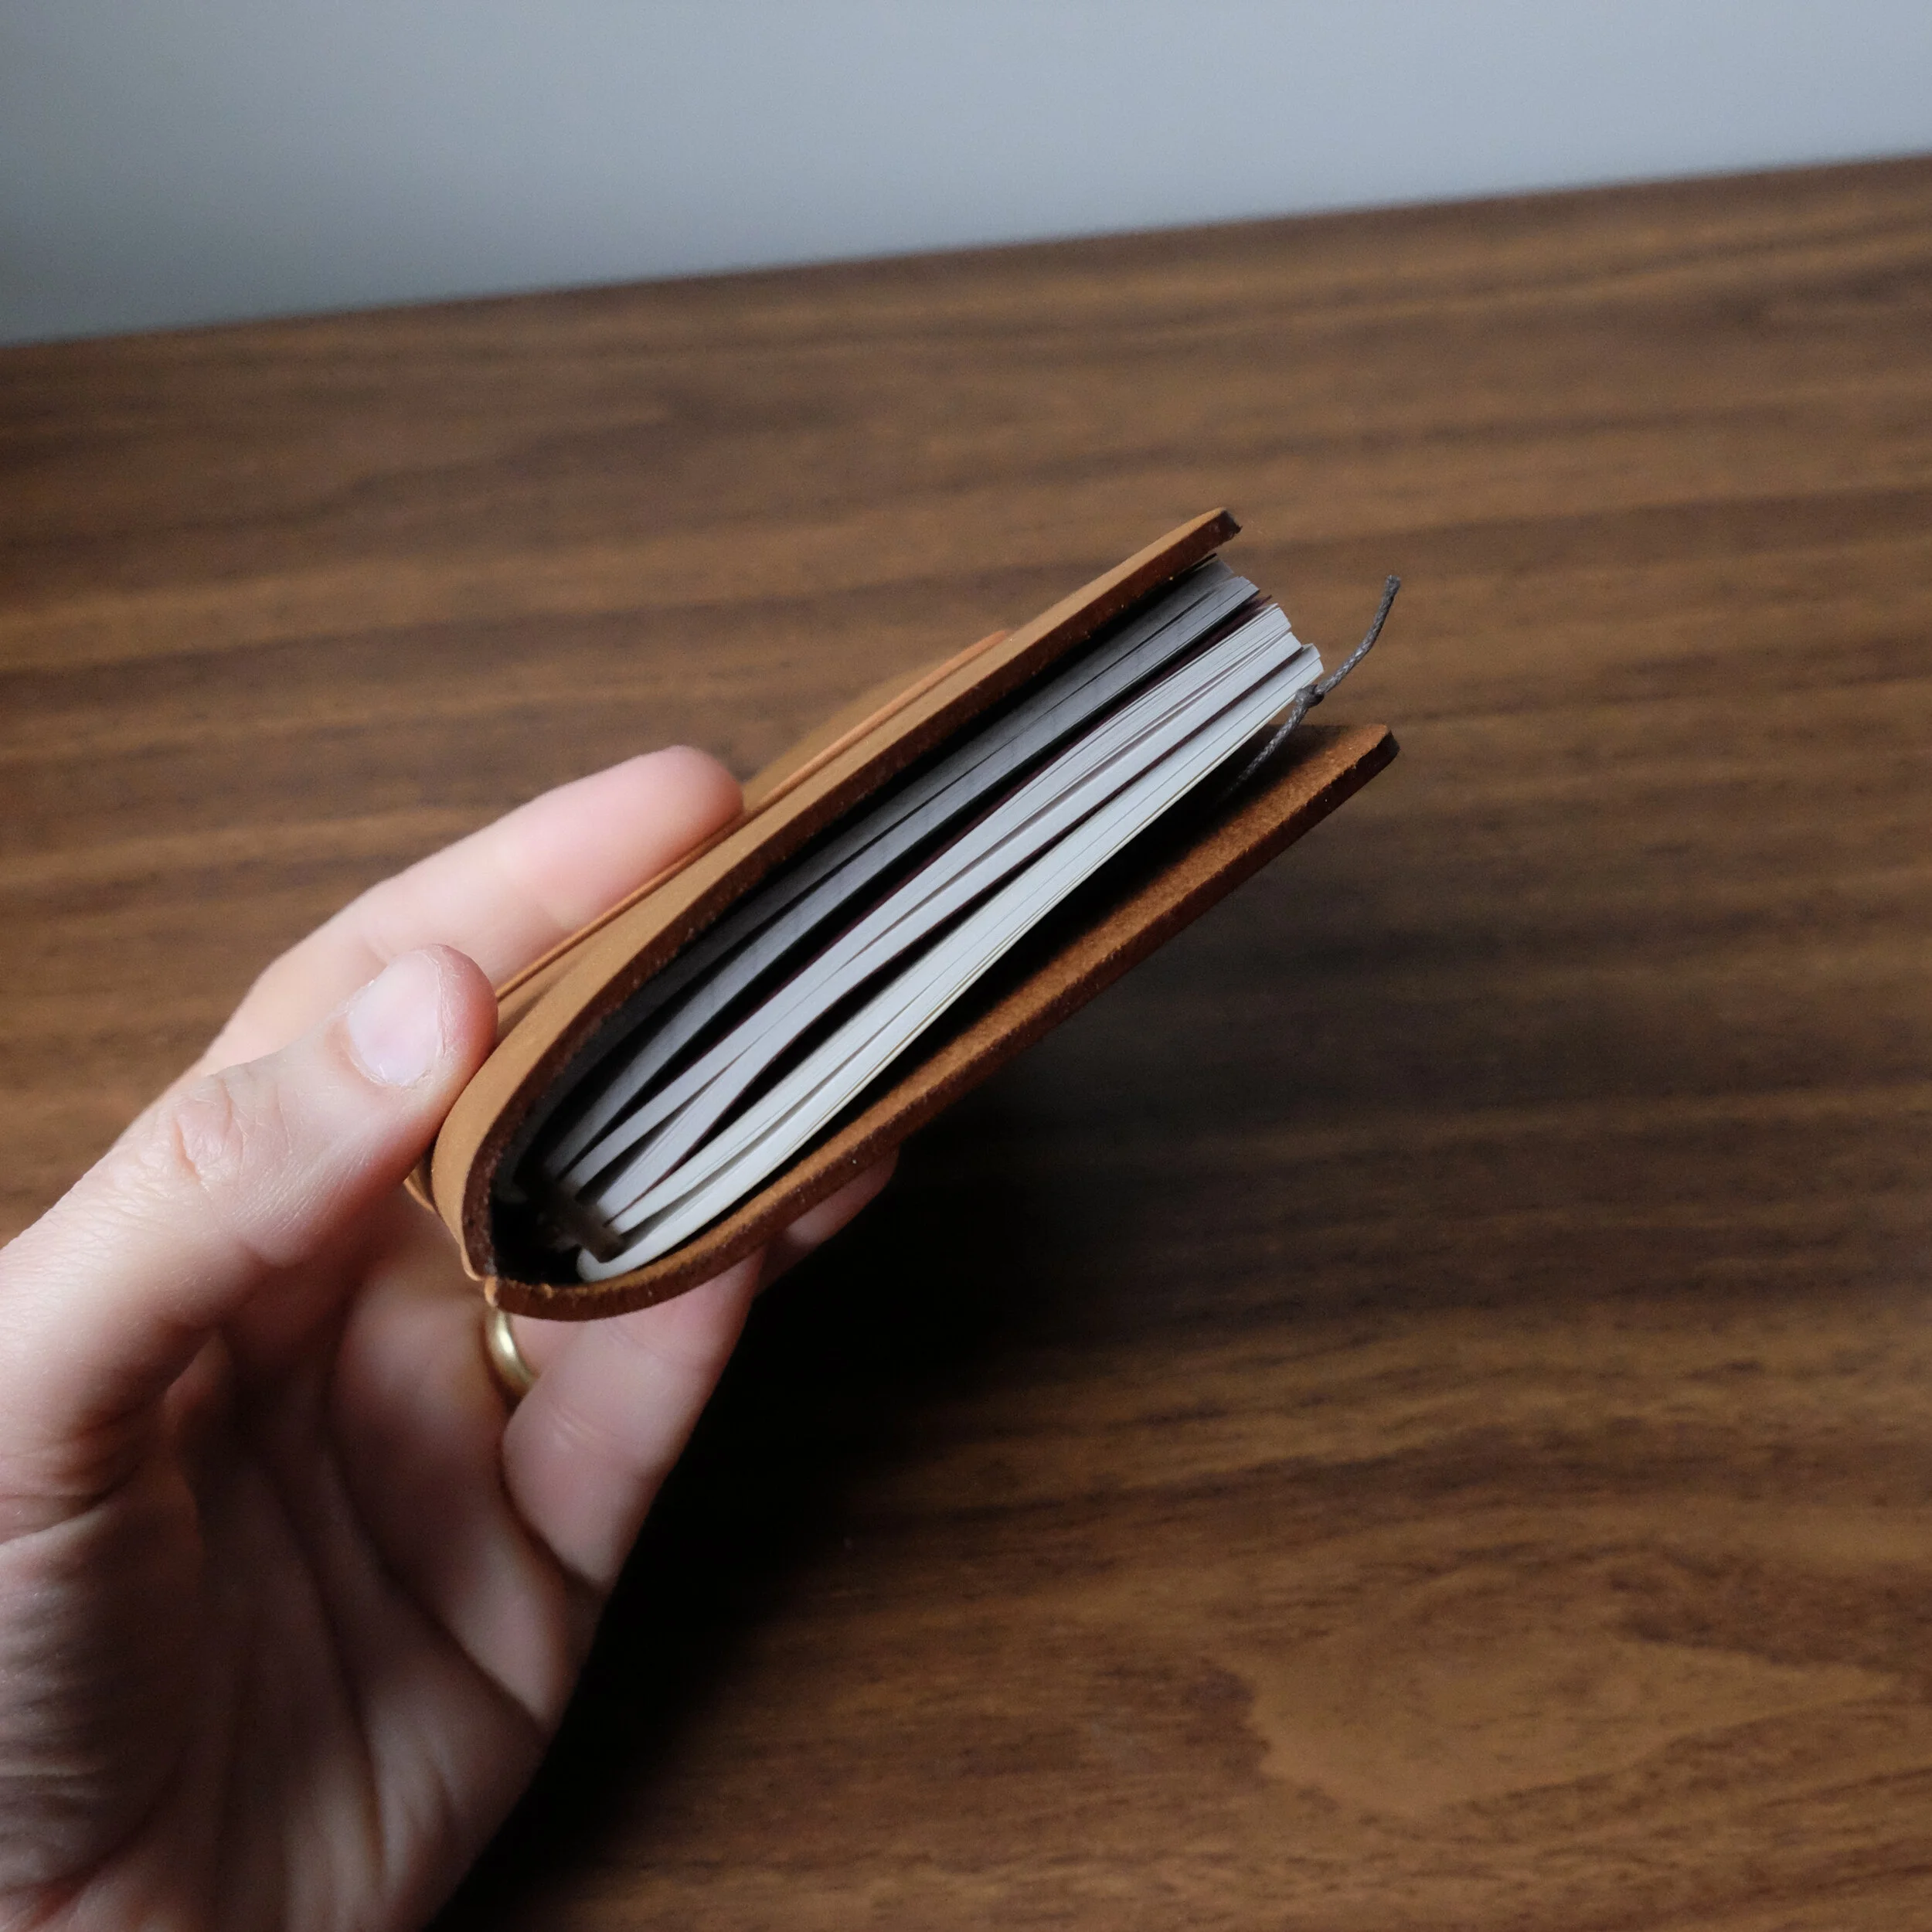
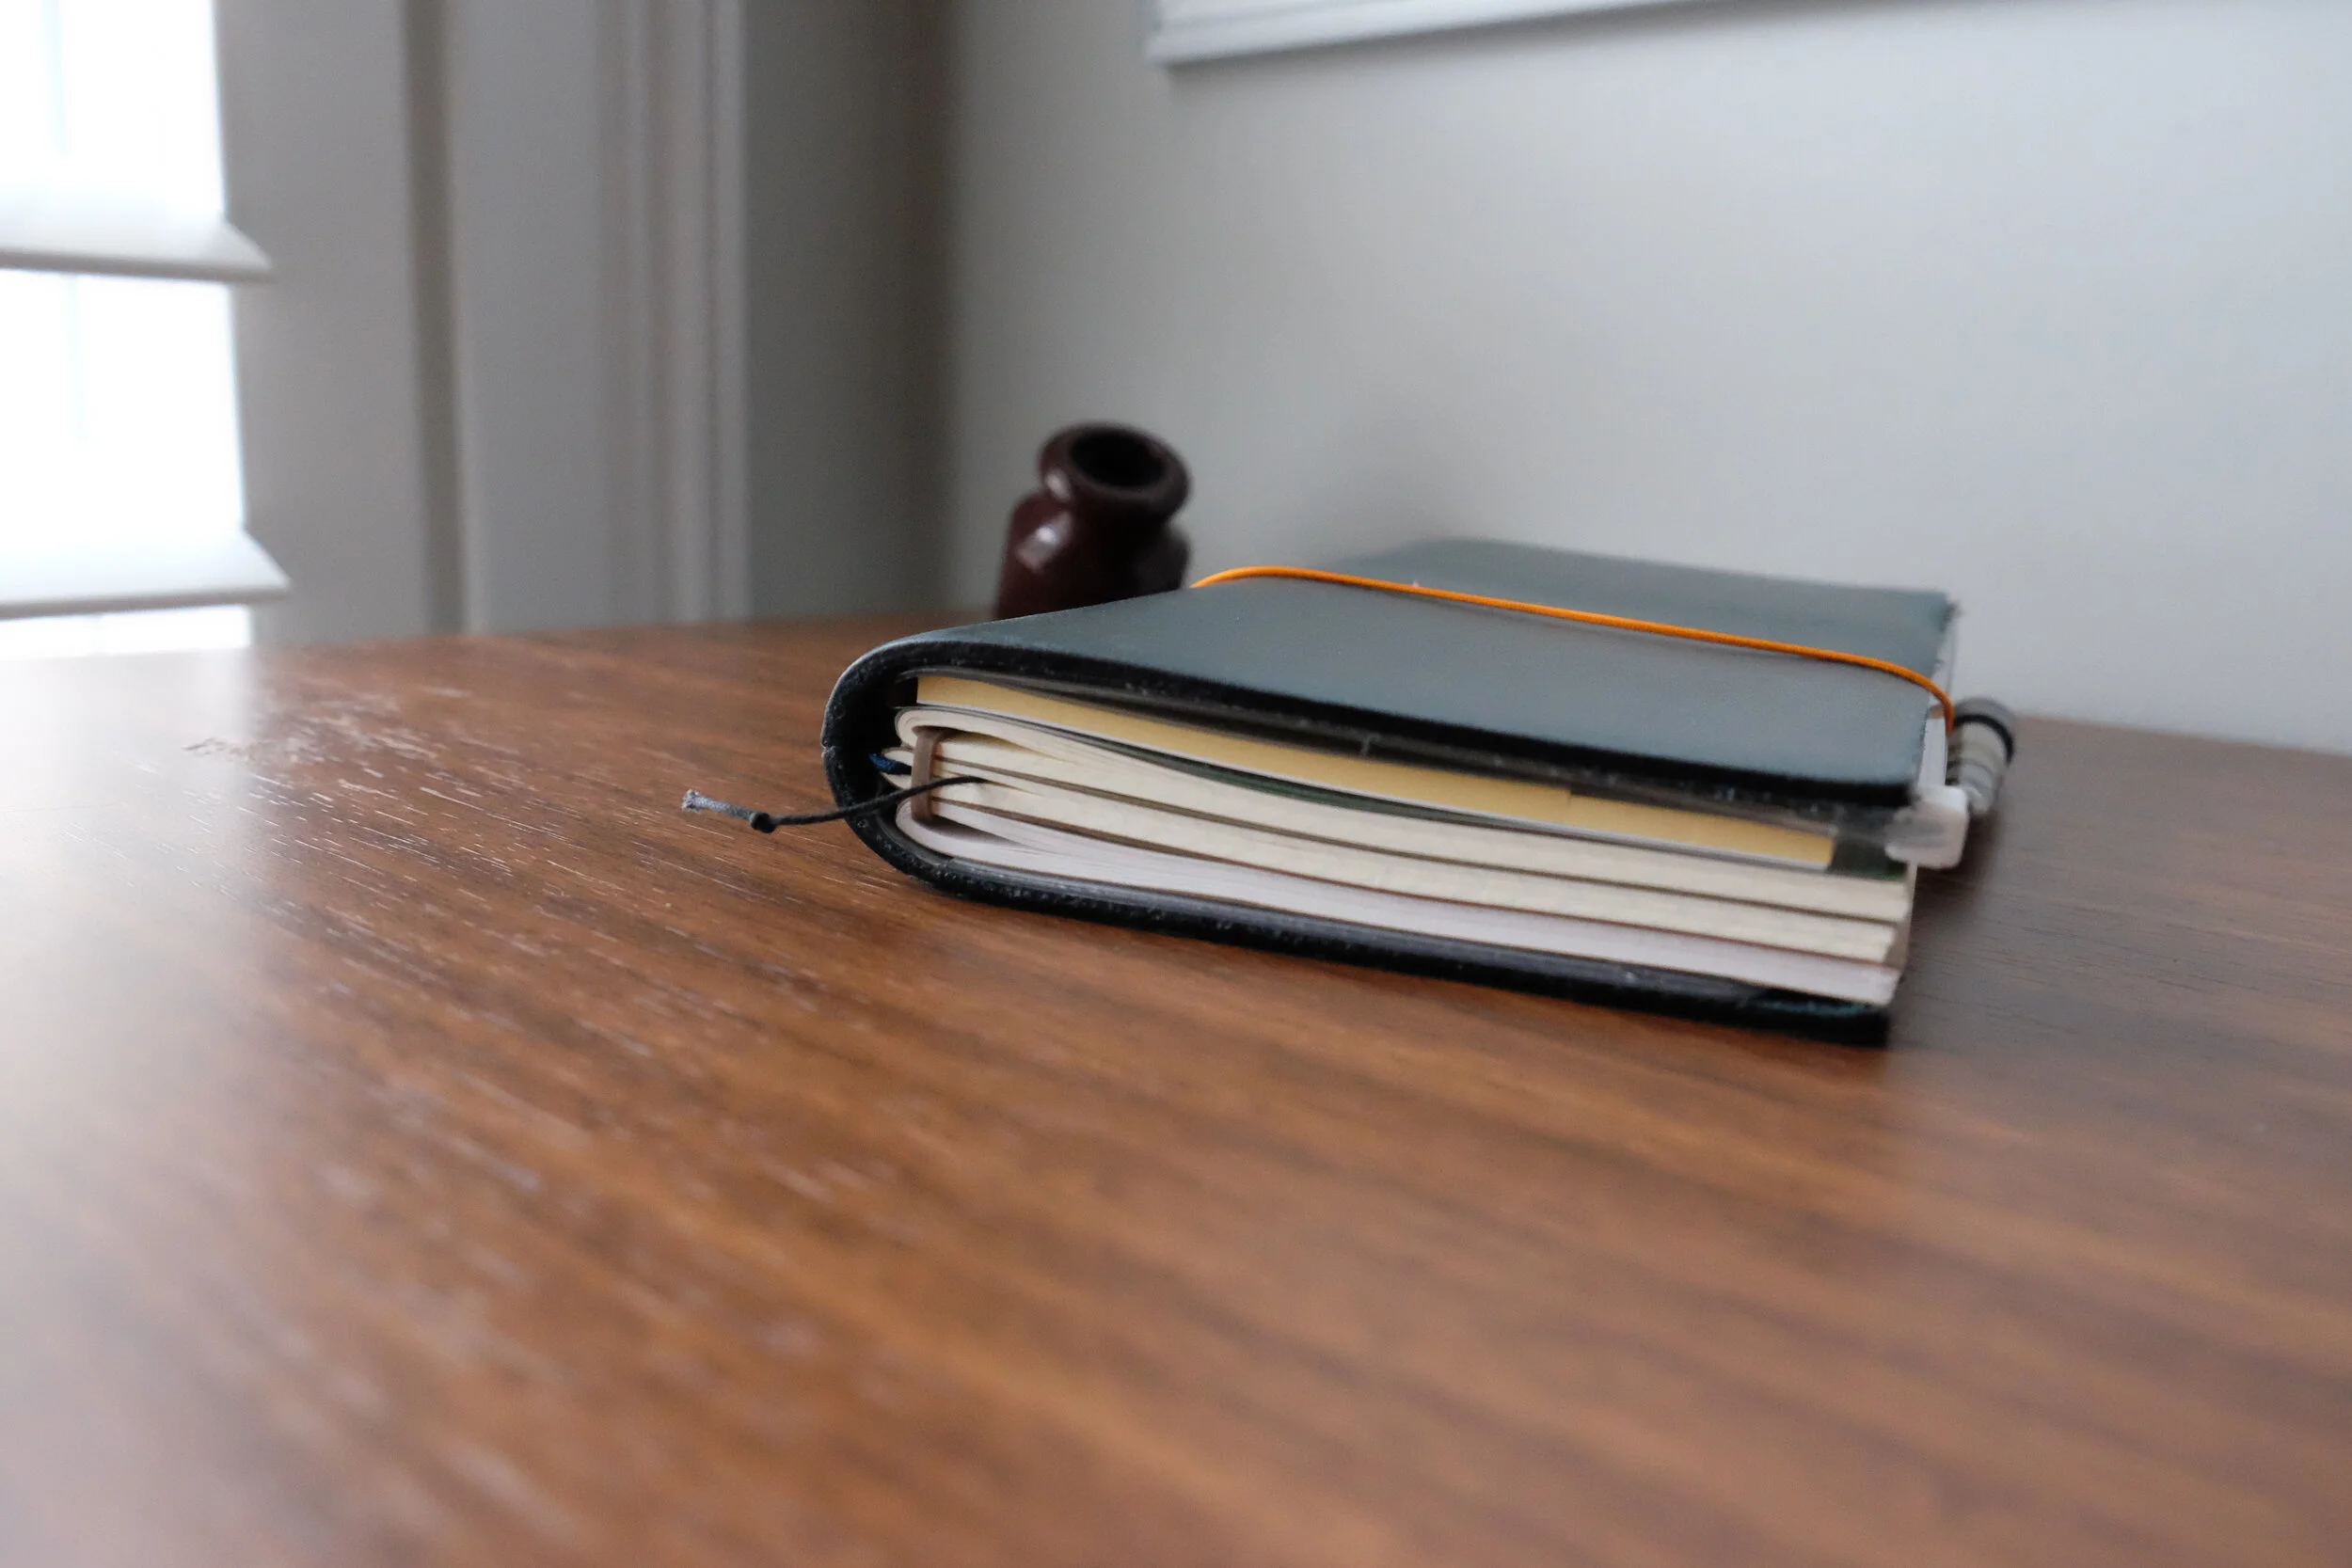
The great thing about standard Traveler’s Notebook refills is that they are the same length as A5, just narrower, so you only need to make one cut. Not only did I convert a few softcover A5 notebooks into additional refills for my Traveler’s Notebook (see photo at top), but I created a thicker bullet journal/undated planner for my personal Traveler’s Notebook using a 1/2-Year Stálogy notebook. I recently finished an undated Weeks + Memo Traveler’s Notebook Planner Refill, and found myself wanting something that would last six months or longer for work purposes. Check this out:

Stálogy paper is extremely thin, so my trimmed-down 1/2-year notebook easily fits in the Standard-size Traveler’s Notebook cover.

Getting Started

If you’re interested in attempting to trim down notebooks, I would start with a very sharp X-Acto or other craft knife (I used a No. 11 blade), a cutting mat, and some sort of straight-edge like a T-square that will help you make a straight cut. I purchased all of the above at Hobby Lobby for around $40. (I’m sure you can find it for less online, but I was bored on a weekend and wanted instant gratification.) I would NOT recommend using a “paper guillotine” or other paper cutter, unless you have access to a commercial-grade tool that’s been sharpened and calibrated so that it cuts evenly. On the notebooks pictured above, I tried to use the paper cutter in my office, but it made cuts that were neither straight nor clean, so I had to finish with the X-Acto. Based on my experience so far, very thin paper such as Tomoe River or Stálogy cuts the easiest with an X-Acto knife. Just be sure to practice on a less expensive refill first.

I do sell 1/2 year and 365-day Stálogy notebooks in the Curated Shop, in several different colors. As an aside, if you would like me to cut a notebook down for you, I’m happy to discuss, though it’s not an “official” service I offer or advertise so I can’t guarantee results. Please reach out and we can talk about what you need.

I wish I could claim credit for the idea to cut down the Stálogy Notebook, but credit goes to @stacysplans on Instagram. Follow her account for more planner-related ideas and content. While I am an authorized Traveler’s Company and Stálogy retailer, this post does not contain third-party affiliate links.

In How To, Paper Products Tags Custom Stationery, Custom Notebook, Cutting Down Notebooks
2 Comments

Traveler's Notebook Tutorial: How to Connect Multiple Refills and Accessories

February 27, 2021

I’ve used the Traveler’s Notebook for years, and regard it as one of the best options for carrying multiple notebook refills inside a single cover. Want to carry a planner, notebook, and sketchbook together, with different papers? You can do that! While connecting multiple refills can seem tricky at first, it’s easy and intuitive once you get the hang of it. The general rule of thumb to remember: A primary refill secured to the notebook cover using the center elastic cord serves as an “anchor” for the entire system, allowing you to add additional refills and accessories using connecting rubber bands.

Changing out a single Traveler’s Notebook Refill is easy - just open the refill to the “staple page” and slip it under the center elastic cord. But most people will want to maximize this notebook system’s versatility. Read on to learn how to add mor…

Changing out a single Traveler’s Notebook Refill is easy - just open the refill to the “staple page” and slip it under the center elastic cord. But most people will want to maximize this notebook system’s versatility. Read on to learn how to add more!

Collect Your Traveler’s Notebook and Supplies

In order to assemble a Traveler’s Notebook containing up to three refills, you will need three things: a Traveler’s Notebook, your three refills of choice, and a package of connecting rubber bands. For this demonstration, I’m using a Passport size Traveler’s Notebook in “Camel” leather, but the process is the same for the Standard size. Here, I will walk through three different setups: a Traveler’s Notebook with two refills, a Traveler’s Notebook with three refills, and a Traveler’s Notebook with three refills plus accessories.

Clockwise from top left: Traveler’s Notebook Connecting Rubber Bands, Traveler’s Notebook Passport in Camel, Blank MD Refill (included in the Traveler’s Notebook Starter Kit), MD Paper Grid Refill, and Tomoe River (“Lightweight” Blank Refill).

Connecting Two Refills

To set up a Traveler’s Notebook with two inserts, attach the first to the notebook cover using the elastic cord, the same as if you were going to set your notebook up with a single insert. Take your second refill and place it next to the first, closed spine-to-spine.

Next, open both notebooks to their respective centers. Holding the two covers together, as shown here, loop a connecting rubber band over both notebooks. In your original refill, the rubber band should sit alongside the elastic cord. That’s it!

A two-refill notebook is perfect for a planner + notebook setup.

Connecting Three Refills

To assemble a Traveler’s Notebook with three inserts, start by picking your three books and decide the order in which you want them to appear in the notebook. Place the first and third inserts back to back, and set the second one aside for the moment.

Open the first and third refills to their centers, and using a connecting rubber band, attach them as shown above, similar to how you connected the inserts in a two-refill notebook.

Close the two refills, and set them face-down on the inside of the Traveler’s Notebook Cover, spine-to-spine and connected by the rubber band.

Gently pull the two notebooks apart, and pull the elastic cord up between the two refills. The connecting rubber band should be just loose enough to allow you to do this easily.

Slip your middle refill underneath the center elastic cord. There! You’ve now secured three refills inside.a Traveler’s Notebook!

Traveler's-Notebook-Three-Refills.jpeg

Adding Accessories

Your Traveler’s Notebook is only limited by how thick you want it to be. In addition to three refills, connected as demonstrated above, I’ve included a PVC Zippered Pouch and a set of TRC Sticky Notes on my Standard Size Traveler’s Notebook.

Attaching the PVC Pouch is pretty easy. I simply slid the pouch underneath the refills through the main elastic cord.

I then attached the Sticky Notes to the PVC Pouch using another connecting rubber band.

The Sticky Notes insert is actually a slim folio, with a think PVC cover to protect your unused stickies. Open the folio and slip the connecting rubber band over the cover and the PVC pouch, much the same as you would connect two notebook inserts.

My current Standard Traveler’s Notebook is set up with three paper inserts and two accessories - in other words a total of FIVE refills + accessories. This obviously increases the thickness and weight of the notebook, but it also transforms it into …

My current Standard Traveler’s Notebook is set up with three paper inserts and two accessories - in other words a total of FIVE refills + accessories. This obviously increases the thickness and weight of the notebook, but it also transforms it into a powerful all-in-one tool.

Traveler’s Notebooks and Accessories in the T.G.S. Curated Shop

All of the Traveler’s Notebooks, refills, and accessories pictured here are available for purchase in the T.G.S. Curated Shop. As an authorized Traveler’s Company retailer, we carry Notebook Starter Kits, MD Paper Refills, Planner Refills, Specialty Paper Refills, and Accessories, in addition to TRC Brass products such as pen cases, rulers, and clips. Please feel free to reach out through the site if you have any specific questions about Traveler’s Notebook products and how to use them. If you’re interested in reading further on my own Traveler’s Notebook setup, check out this recent post in which I walk through the standard setup pictured here.

In How To, Guide, Notebook Review, Planners Tags Traveler's Notebook, Traveler's Company, How To
4 Comments

Picking a "Workhorse": How To Choose A Fountain Pen for an Everyday Writer

September 28, 2019

By far the most common question I receive from readers, as well as other people in my everyday life who know that I love pens, is how to choose a fountain pen to use as an everyday writer. Sometimes, they even specify that this will be the only pen they plan to own/use! I basically write for a living, both here and at my day job, so I don’t take this question lightly and it’s also a difficult question to answer, because so much depends on personal preference, not to mention financial circumstances. The truth is that there are a variety of excellent options if what you are looking to do with the fountain pen is actually write. The best choice for you, however, depends upon your particular preferences and circumstances. This post offers my thoughts on different factors you should consider when selecting a pen you plan to use every day.

First, Budget

Be honest with yourself, and don’t feel pressure to stretch financially, because in today’s fountain pen market there are going to be viable options at any price point, even on the extreme low end of the pricing scale. If you are willing to spend as little as $25 you can purchase a reliable pen and avoid serious quality control issues. In any event, even if you have more flexibility, I would think hard before spending more than $200, since using a pen as a daily writer does bring with it the increased risk of loss, theft, and damage.

PenBBS has absolutely blown me away this year. You don’t need to spend a lot of money to get a reliable writer that holds a ton of ink.

Filling System

From the perspective of a writer, a fountain pen’s filling system is more important than many people make it out to be. If I’m busy at work, I can burn through a cartridge or a converter in an afternoon. If I’m in a place where I can’t refill, or don’t want to carry multiple pens, I need a pen that holds a lot of ink. My personal preference is a piston or vacuum filler, since these hold significantly more ink than a converter. Eyedroppers are another option, but for daily use I would highly recommend a Japanese-style eyedropper that uses a valve to prevent ink spilling or burping into the cap when the pen is not in use, especially if the pen will be carried in a briefcase, backpack, handbag, etc. where it’s going to get jostled around.

For those who don’t write a dozen pages or more a day, a cartridge-converter pen should work perfectly well for daily use, and you may find it more convenient to have the cartridge option if the pen runs out of ink at work. Just be aware that many brands (specifically Pilot, Sailor, Aurora, Lamy, and Platinum) take proprietary cartridges, so you will be limited to cartridges and ink colors made by that specific brand, unless you want to refill the cartridges yourself using a syringe or bottle-fill from the converter.

Piston fillers or cartridge-converters? Again, you have multiple options, and the best choice for a daily writer depends on how often you need to refill, and the most convenient option for refilling on the go. From left, the Pilot Custom 74, Lamy 2000, and Pilot Custom Heritage.

Weight and Balance

Once you’ve narrowed your budget and decided what type of filling system you want, the most important consideration becomes how the pen feels in your hand. Remember, you’re going to write with this thing every day, so while looks are important, comfort is key. Two of the most important things I look for in a pen are weight and balance. The two concepts are related, but distinct. By weight, I’m referring to how heavy the pen is. Certain types of pens (particularly metal pens made of copper, stainless steel, or brass) are better suited, in my opinion, for shorter notes and pocket carry, because their heft can make your hand quite tired after several pages. There are exceptions, but I’m dealing in general rules-of-thumb today.

I’ve tried a lot of pens, and none feel better in my hand than the Lamy 2000, which is made of Makrolon, a type of polycarbonate. It’s quite lightweight.

Balance is a different issue, and relates to where the weight of the pen sits. Do you post your pens, like me? If so, make sure that the cap isn’t too heavy because it will back-weight the pen and make writing awkward, even if the pen isn’t that heavy overall. Front-weighted pens (i.e., those with metal sections), typically don’t pose the same problem, since many people, myself included, prefer a pen in which the weight is shifted to the front, which keeps the nib on the paper and offers an additional degree of control over your handwriting. Because weight and balance are such a key consideration, it’s important to be able to either hold a pen in person prior to purchasing, or purchase from an online retailer that permits returns, especially if you’re shelling out a lot of money for a higher-end pen.

Nib Choice

Is the nib the most important part of the fountain pen? Yes and no. If you have a pen that feels great in your hand, but has a crummy nib, the pen isn’t usable, so the nib IS important. However, a bad nib can usually be improved through tuning and/or smoothing. On certain models of pens (TWSBI, Pelikan, Kaweco, among others) you can even switch out the nib and substitute one that’s a different size or even a specialty grind. For that reason, I tend to prioritize the weight, balance, and overall “feel” of a pen over the nib. Unless the nib is absolutely god-awful, it can be adjusted. The size and heft of the pen can’t.

I’ve had great experiences with the nibs on the Leonardo Momento Zero. They’re nothing fancy, but all of mine have arrived well-tuned and they certainly get the job done.

With respect to nibs, what’s most important is choosing the right type of nib for the work you want to do. If you write very small, and your day job (like mine) involves annotating or marking up documents that are often printed on the cheapest recycled paper available, you will likely want to choose something in the extra-fine to medium range and be particular about which inks you use. Those with larger handwriting, and who don’t need to write on cheap paper, have more flexibility to go with a broader nib or even a stub as their daily driver. Unless your day job involves calligraphy, however, I generally advise people to avoid super “soft” or “flex” nibs for everyday writing, as they tend to write far too wet.

Recommendations

Hopefully this short guide is helpful. Readers of this blog won’t be surprised to know that after considering all of the factors above, my own preferred “workhorse” pen is the Lamy 2000. I have several of them, and in addition to the fountain pen regularly carry the rollerball, ballpoint, and 4 Color Ballpoint (multi pen). From a fountain pen perspective, I love the Lamy 2000 because (1) it’s perfectly balanced for my hand; (2) it holds a lot of ink; and (3) I love both the way the hooded nib writes AND how it “disappears” in a crowded meeting room, where you don’t want to be that guy writing with a distracting fountain pen.

When I find a pen model I like, I go all out. Hence my collections of Lamy 2000s and Leonardo Momento Zeroes (pictured here)!

But what works for me may not - and in fact, probably won’t - work for you! While I maintain an annually updated list of pen recommendations, I’ve never published a “ranked” list of “Workhorse” fountain pens because the criteria are so subjective. I won’t rank pens here either, but I will provide several suggestions within particular price brackets. Everything listed here is a pen that I enjoy using and either regularly carry or would have no issues doing so. Where possible, I’ve linked to my own reviews, and otherwise to a retailer I trust.

  • $20-$50:

    • Platinum Plaisir. I’ve come to believe that the Plaisir might be the best “cheap” pen on the market, especially for one that you plan to use regularly.

    • PenBBS 308 or PenBBS 309. The 308 is a cartridge-converter pen; the 309 is a piston filler. The time has come for PenBBS pens to start appearing on recommendation lists alongside TWSBIs. They’re that good.

    • PenBBS 456. PenBBS’s vaccum-filling model, for around the price of a TWSBI Eco.

    • Faber-Castell Essentio. Faber-Castell makes the best bargain-priced steel nibs on the market.

    • TWSBI Eco. If people ask me for a TWSBI recommendation, I often recommend the Eco over the 580 because (1) it posts; and (2) it’s hard to beat the combination of price, availability, and reliability.

    • Kaweco Sport (Standard). If you don’t mind a shorter “pocket pen,” Kaweco Sports are inexpensive, reliable, and come in a wide array of colors. If you prefer chrome trim, check out the “Skyline” model. You can also swap nibs.

  • $50-$100:

    • Faber-Castell Loom. I prefer the Loom to the Essentio because it posts better. It’s only slightly more expensive and uses the same excellent nib.

    • TWSBI 580. If you want a TWSBI that uses interchangeable nibs, opt for the 580 series. If you want a TWSBI with interchangeable nibs that posts, opt for the TWSBI Diamond Mini.

    • Opus 88 Koloro or Opus 88 Picnic. The only eyedroppers I recommend, because they have the Japanese-style valve system that helps prevent “inkcidents.” Be aware that the Omar and “Demo” pens are very large.

  • $100-$200:

    • Lamy 2000. See above. My personal workhorse.

    • Pelikan M200/M205. Another relatively inexpensive piston filler, which comes in a wide array of different colors and patterns, including special and limited editions. Pelikan pens are reliable and will stand up to years of use.

    • Leonardo Momento Zero. A recently released pen out of Italy, available in some exceptionally pretty materials. Lightweight and reliable writers.

    • Pilot Custom 74. An underrated cartridge-converter pen with an exceptional nib. These pens don’t get nearly as much attention as they should. If you absolutely want a piston filler the Custom Heritage 92 is an option for more money.

    • Platinum 3776 Century. A pen that attracts a lot of attention for the collectibility of the limited editions, but also excels as a daily writer. Platinum offers a wide range of nib options for this pen.

  • OK, I want to blow it out ($200+)

    • Sailor Professional Gear (“Pro Gear”). My pick for a high-end cartridge converter pen. Sailor nibs are exceptional, and the Pro Gear is a well-balanced writing instrument, especially posted.

    • Pilot Custom 823. A vacuum-filler that posts well and makes for an comfortable writer despite the larger size.

    • Montblanc 146. Many people won’t carry a Montblanc because they find the branding pretentious. While I agree these pens have become a bit of a status symbol, they’re still great pens, hold a good amount of ink, and despite what people say, the standard Meisterstuck pens aren’t ostentatious.

    • Pelikan M400, M600, or M800. Personally, I think the Pelikan M400 and M600 make better everyday writers because they are much lighter than the M800.

    • Conid Bulkfiller. If you want the ultimate “ink tank” and cost is no object, get a Conid. Bulkfillers come in a wide array of shapes and sizes to suit any preference.

Again, I hope this is helpful! Please reach out through the comments or “Contact Me” link if you have any additional questions, or would like to share any additional information you take into account when choosing your daily writers.

In Guide, Editorial, How To, Workhorse Pens Series Tags Editorial, Workhorse Pens, How To, Pens
12 Comments

Water and White Lightning: Fixing High Maintenance Inks

September 18, 2019

For years I avoided certain ink brands, namely Noodlers and Private Reserve, not because I actually believed those inks would destroy or “melt” pens, but because of batch inconsistency and the fact that many of the inks bled and feathered on all but the thickest coated paper. Others never dried, remaining tacky and subject to smearing for up to a week or more. I would get frustrated and give up, selling or giving away the bottles I had accumulated.

With nearly a decade in this hobby under my belt, I’m slightly more patient than I used to be, and writing this blog has provided me with the opportunity for experimentation. Noodlers makes a wide range of vibrant and unique colors, and most of the inks are so saturated with dye that you can add a couple drops of water or ink additive to improve the ink’s behavior without changing the color significantly or sacrificing vibrancy. The only caveat is that by diluting the ink, you run the risk of compromising special properties such as “bulletproofing” (permanence/water resistance) or quick-drying. I generally don’t purchase inks for these reasons, however, other than a couple water-resistant inks I keep in my collection, and I’ve found that most aren’t significantly affected by a drop of dilution.

Noodler’s Walnut has always been a favorite of mine, but I’ve had trouble with feathering and slow dry times if I use the ink undiluted. How did I fix it? Read on below.

So How Do I “Fix” Problematic Noodlers Inks?

I’ve found that certain Noodlers Inks that are prone to feathering, bleeding, and extremely slow dry times work better with 1-5 drops of water added to a 5ml sample vial. Inks such as Air Corps Blue Black and Walnut are great colors, but sometimes bleed, feather, and smear on cheaper paper, or take a long time to dry on fountain-pen friendly paper like Clairefontaine, Rhodia, or Tomoe River.

Writing Samples of Noodlers Walnut, Air Corps Blue Black, and Shah’s Rose, three colors that behave extremely well with a touch of water (Walnut, Air Corps) or a tiny drop of White Lightning (Shah’s Rose).

On the other hand, for inks that are too dry, I take the same amount of ink (5ml in a sample vial) and add a tiny drop of Vanness Pens “White Lightning” ink additive. You might remember a version of this product when it was sold by Organics Studio, under the moniker “Cuddles Flo Plus”, but Vanness acquired the formula after Organics Studio discontinued it and are now bottling the product directly. White Lightning is intended “for use in poor flowing or dry inks to increase flow consistency,” and the product really does work. I can’t emphasize enough, though, that you should use this product sparingly, and do not add directly to the bottle unless you are extremely sure of the amount. Use too much and you can turn a dry ink into the inverse: an ink that feathers, bleeds, and never dries. I’ve had success using White Lightning to improve the flow of drier Noodlers Inks such as basic Noodler’s Black, 54th Massachusetts, and Shah’s Rose. I’ve also spoken with other people who swear that White Lightning improves extremely dry inks such as certain Kyoto TAG inks, as well as Platinum’s “Classic” series of Iron Gall inks.

One of the great things about Noodlers is that the bottles come filled to the brim. (Just be careful opening them for the first time.) I’ve actually heard some people describe the full bottle, the super-saturation, and the need to dilute certain colors as a “bonus,” because it makes the bottle last a very long time.

Takeaways and Where to Buy

Noodlers Ink is widely available from most pen retailers, and the bottles pictured here were supplied by site sponsor Pen Chalet. What I’ve discovered over the years is that Noodlers makes “tinkerer’s inks.” If you don’t mind playing around with the formulation, you can better enjoy the wide range of colors and properties that the brand has to offer. White Lightning Ink Additive can be purchased from our sponsor Vanness Pens, and is a product exclusive to them. This unique product really does work, and if you have a large ink collection that includes colors you love but can’t use due to how the inks themselves behave, consider experimenting with water dilution or additives to tailor the inks to your preference.

Disclaimer: The inks and ink additive were provided to me free of charge by my sponsors, for review purposes. Many thanks to Pen Chalet and Vanness Pens for making this review possible!

In Ink Reviews, How To Tags Ink, Ink Review, White Lightning, Noodlers Ink, Vanness, Modifying Inks
2 Comments

It's pen cleaning time this weekend! Conid's Bulkfiller Minimalistica has been a pleasant surprise for me, in terms of how easy it is to clean. 

Cleaning Pens: Meditative, or Just Annoying?

February 20, 2016

Which camp do you fall into?  Of course, this refers to fountain pens.  If you have to clean ink out of your rollerball, ballpoint, or gel pen, it's probably because something very, very bad happened. But pen maintenance is an essential part of fountain pen ownership.  You have to do it, and to the extent you can, you should learn to love it.  Do I?  Sort of. 

Pen cleaning is one of those things people do either (1) all the time, such as, after they finish every fill of ink; (2) semi-regularly, such as whenever they change colors or every 1-2 months; or (3) whenever the pen clogs up and stops writing.  I'm squarely in the second category.  I don't find cleaning pens to be torture, per se (unless it's one of the rare occasions I've been using some sort of Noodler's permanent ink), but it's not something I necessarily look forward to.  

I'll walk through the various categories of pens that I clean on a regular basis, from what I consider to be the least difficult to the extremely aggravating, and provide my perspective on which of the various filling systems are easiest to maintain.  While the basic principle is the same for all--flush the pen with water--each system has its own peculiarities and quirks that need to be taken into account.

Syringe Fillers.  Say what you will about Conid's Bulkfiller system being hard to get the hang of. Once you do, these pens are a snap to clean.  It's like using a built-in bulb syringe (see below).  Because the pen has such a large ink capacity, it's capable of pushing a large amount of water through the nib, reducing the number of times you have to flush it.  If the pen's clogged, or if you've used an ink that's extremely difficult to clean out, you may have to disassemble the pen, but most syringe fillers have a small number of moving parts, and Conid even provides you with tools and instructions.  

Cartridge/Converter.  I have a growing appreciation for cartridge/converter pens because of how simple it is to clean and maintain them.  While you technically don't need any special equipment, and can just use the converter to flush water through the feed and section several times, a bulb syringe and an ultrasonic cleaner allow you to thoroughly clean your pen quickly. For me, one of the best features of the cartridge/converter system is that you don't actually have to worry about cleaning the entire pen.  Typically, the only part of the pen that touches any ink is the nib section and the converter (though I would recommend occasionally cleaning out the interior of the cap).

Eyedropper.  Some people are going to be puzzled at this one.  How, they might ask, is an eyedropper filling system--where the entire barrel holds ink--more convenient than the piston filler?  Because there are no moving parts, and all you have to do is drop the entire pen into the ultrasonic cleaner.  (In the "after" photo below, there is still some blue-black residue in the barrel, which I will clean out with a q-tip if I decide to change colors.)  While disassembling a pen takes time, you don't have to do it that often! Eyedroppers hold a ton of ink, and if you use a low-maintenance ink and don't feel compelled to change colors, well, you can go a long time without cleaning that pen!   

View fullsize Before Flush + Ultrasonic
View fullsize After Flush + Ultrasonic

Piston Filler.  Some piston-filling pens are easier than others to clean.  Pilot's Custom Heritage 92 is a snap (because the piston is highly efficient and works well), and the clear TWSBI demonstrators are also somewhat convenient because they are transparent and relatively easy to disassemble if necessary.  At the end of the day, however most piston-filling pens simply take a long time to flush out all the ink, and I often worry whether that repeated flushing is good for the piston mechanism.  I've had particular difficulty cleaning my Montblanc 146 and my Pelikan M600, though the otherwise excellent Lamy 2000 can be a pain as well.  On all three, I've noticed that the piston mechanisms have loosened up over time, after many many cleanings.    

Pilot's excellent Custom Heritage 92 is extremely easy to clean.  The piston is highly efficient, and as you can sort of see from this terrible photo, the piston fills the ink chamber to capacity, making it easier to flush out the pen.

Sac-Filling Pens (Lever and button Fillers).  Flush these pens with water until it runs clear.  I have these pens listed pretty far down on the convenience list because sacs tend to accumulate ink residue inside them, and it's generally impossible to have any visibility into what's going on inside the pen because they aren't made to be disassembled on a regular basis.  I very rarely use anything other than a "safe" blue or black ink in a pen that fills using a sac. 

Vac-Fillers.  And then, we come to the end.  I love the mechanics of a good vac-filling system, whether it be the classic Parker Vacumatic and the Edison Menlo.  I absolutely hate cleaning them.  After much experimentation, I have scientifically determined that it is physically impossible to get all of the ink residue out of a Parker Vacumatic. No, not really, but it takes so long, and involves so much repeated filling/emptying the pen with water, that I've given up on regularly changing the inks that I use in these pens and stick to "safe blue" or "safe black".  To illustrate how much effort (and ingenuity) it takes to clean these things thoroughly, check out this article by Ron Zorn, who built a centrifuge out of a salad spinner.  (Yes, really.)   In all fairness, the Vacumatic filling system is the product of a time period when most people used three colors of ink (blue, black, and blue/black), so this probably wasn't an issue back then.  (See note below:  a "vac-fill" pen is a pump filler, distinct from the "vacuum-fillers" made by TWSBI and Pilot.  For a demonstration on how a "vac-fill" pen works, see Brian Gray's video.) 

As you can probably tell, this post isn't intended to be a comprehensive, "how-to" guide on cleaning pens (though that may not be a bad idea in the future).  I mainly wanted to provide my thoughts on how easy/difficult I've found certain filling systems to maintain, since it's such an important part of pen ownership.  Opinions may differ.  But if I could provide you with one "semi-pro tip", it would be:  

Buy An Ultrasonic Cleaner.  I was once a skeptic, but about a year ago I purchased one at Bed, Bath & Beyond on a lark and I've since become a convert.  You can get these things really cheap (even cheaper if you have one of those ubiquitous BBB 20% off coupons).  The ultrasonic cleaner is great for cleaning ink out of the nooks and crannies of feeds and nib sections, and saves your fingers a lot of repeated flushing.   If you use a lot of red ink, like I do, the ultrasonic is a lifesaver, because reds can be notoriously difficult to flush.  

Note:  I don't have a ton of experience with vacuum-fillers such as the Pilot Custom 823, TWSBI Vac 700, or the TWSBI Vac Mini, at least not yet. I've recently picked up a Vac Mini, and plan on having my thoughts on the pen up on the blog soon.  I expect that in terms of ease-of-cleaning, these pens will probably fall somewhere between a piston filler and a vac-fill.     

In How To Tags Pen Cleaning, Maintenance
6 Comments
← Newer Posts Older Posts →
Store Hours and Location
Visit the T.G.S. Curated SHOP
Updated "Best Pens" Guide
On the Paper Trail Podcast
TGS_25 Roterfaden New Stock Available
Hierarchies of Fountain Pen Friendly Paper

Join Our Patreon!
Subscribe to the TGS E-mail List

Featured Posts

Featured
Pentel-Sign-Pen-Cover.JPG
Feb 28, 2026
Pen Review: The Pentel Sign Pen (Craft Design Technology Version)
Feb 28, 2026
Feb 28, 2026
Cover On the Paper Trail Intro Clip.jpeg
Dec 3, 2025
Introducing "On the Paper Trail," a New Podcast/Video Collaboration with Lisa Vanness of Vanness Pens!
Dec 3, 2025
Dec 3, 2025
Iro-Utsushi-Fine-Dip-Pens.jpeg
Oct 1, 2025
The Pilot Iro-Utsushi Dip Pen (and in General, Simple vs. Fancy Dip Pens)
Oct 1, 2025
Oct 1, 2025
The Gentleman Stationer RSS

© Digital Divide Media, LLC, 2014-present.

All content is the exclusive property of Digital Divide Media, LLC, d/b/a The Gentleman Stationer, including “The Gentleman Stationer” website and trademark, and should not be reproduced without express written permission.  All rights reserved.

All content containing paid advertising, affiliate links, or sponsored content will be plainly disclosed by a disclaimer when/if featured.

Contact Information

Store Shipping Policy and Return Policy

Privacy Policy

Cookie Policy

Terms and Conditions

Powered by Squarespace